Crashing is part of cycling as crying is part of love.
Johan Museeuw
- The Lion of Flanders
Crashing is part of cycling as crying is part of love.
Johan Museeuw
- The Lion of Flanders
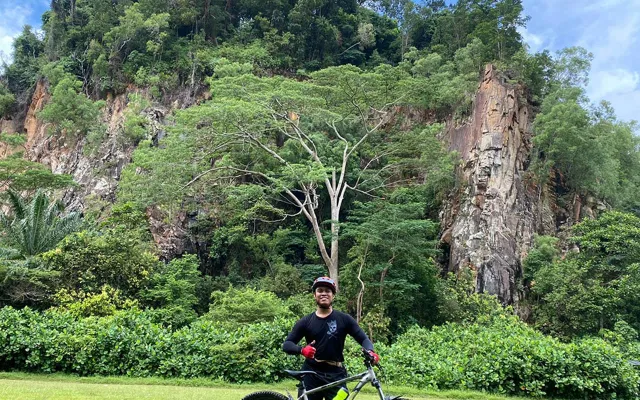
Conquer the Mountain. Find Your Freedom.
Conquer the Mountain. Find Your Freedom.
Let’s be honest: most people don’t talk about the not-so-glamorous side of your first mountain bike ride. The chafing. The saddle soreness. It definitely puts a damper on the “fun” factor.
But what if I told you mountain biking doesn’t have to be an initiation into discomfort? Here’s the truth: with a few key tips, you can ditch the pain and embrace the pure joy of shredding trails.
Mountain biking for beginners isn’t about instant glory. It’s a journey – one filled with exhilarating climbs, heart-pounding descents, and maybe a few wipeouts (we’ve all been there!). But trust me, the challenges are totally worth it.
This guide focuses on the not-so-obvious basics, building good habits that will set you up for a lifetime of epic mountain bike adventures, with minimal soreness and maximum stoke (that’s mountain biking speak for excitement!).
We’ve all been there: cruising down the trail, a rock suddenly appears, and panic sets in. Our eyes glue to the obstacle, and next thing you know, we’re heading straight for it. Here’s the secret: mountain biking is all about where you look, not what you fear.
By focusing on your target, your body naturally steers you in that direction. This is why looking past the obstacle is crucial. It might feel counterintuitive, but trust us, it works!
Here’s how to master the “look ahead” technique:
Why This Works:
Braking might not be the most exciting part of mountain biking, but here’s the secret: mastering your brakes is the key to a smooth and confident ride.
Braking before tricky sections keeps you balanced and in control, boosting your confidence as you know you’re prepared for what’s coming. Think of rough terrain, obstacles, and corners as “danger zones” where slowing down beforehand is crucial. Braking at the last minute can make you lose traction and take a tumble.
Braking Techniques:
Bonus Tip: Braking in Emergencies
If you do find yourself needing to slow down suddenly:
Use Rear Brake Only: In a hairy situation, use only the rear brake to avoid going over the handlebars with the front brake. However, this will slow you down less effectively.
Keep your tires on the ground, no jumping, not even small ones, no matter what your friends say. You can do those fun tricks later. Right now, just focus on having a relaxed ride. Try to finish the trail without stopping too much. Remember where you had to get off and walk.
Next time, try to ride through those tough parts. You don’t have to do it all at once, but keep trying. With more rides, you’ll get stronger and better. Once you can finish the trail without walking, then you can start doing those fun tricks you’ve been thinking about.
Adjust your speed to what feels right for you. Don’t let anyone pressure you into riding faster than you’re comfortable with. If something feels scary, it’s okay to walk. No judgment here—it’s your first time, after all.

While it’s natural to want to slow down and carefully navigate obstacles, sometimes going too slow can actually make things tougher for beginners.
Momentum is your friend on rough trails. Riding too slowly means your bike will get caught in every hole and bump. But with a bit of speed, you’ll glide over them more smoothly.
Sure, it can be intimidating, but facing fears is how we grow. And if you’re here, it sounds like you’re up for the challenge. Just keep in mind, higher speeds mean higher risks. Stick to trails that match your skill level and progress at your own pace.
When you’re out mountain biking, staying loose and relaxed is key, especially in your arms and shoulders. Being relaxed makes handling your bike much easier.
Riding over rough terrain can be jarring, causing stiffness and discomfort in your joints and muscles. But when you stay loose, your body acts like extra suspension, reducing the impact.
Keep your chest low to the handlebars to lower your center of gravity, making it easier to steer and keeping your shoulders and elbows relaxed.
Let your body move independently of the bike; while your hands and feet stay on the pedals and handlebars, let your legs, arms, and hips move freely. This gives you better control, improves your speed, and boosts your confidence.
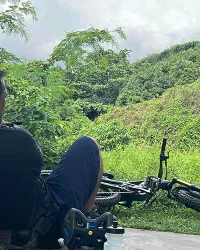
Take breaks to appreciate the scenery. Half the fun of mountain biking is exploring places you couldn’t reach on foot. It’s a beautiful experience.
Remember, mountain biking is all about smoothness and embracing adventure. Stay calm, stay flexible, and enjoy the ride. Stick to trails that match your comfort level, and tackle obstacles with confidence. They’re only as intimidating as you let them be.
Don’t push yourself to the point of exhaustion. Climbing can be tough, especially if you’re new to mountain biking, and it can wear you out both physically and mentally.
It’s crucial to listen to your body. Stop when you need to catch your breath and rest. We’ve seen instances where riders had to call for emergency medical help because someone collapsed from exhaustion and had trouble breathing.
When you’re a beginner or haven’t been on the trail for a while, keep your rides relaxed and enjoyable. Be kind to yourself. You might not conquer every obstacle, climb every hill, or nail every descent this time, but with time and practice, you will.
Always bring plenty of water and drink a bit every time you stop. Carry snacks too. When your blood sugar drops too low, everything feels harder and more daunting.
This is often called “bonking.” New riders tend to underestimate how much energy they’re using and don’t realize how important it is to refuel during rides. Always bring water and snacks on your ride, no matter how short the ride is. Nothing good comes from being hungry or dehydrated.
Personally, I always bring water and electrolytes. I don’t usually need to bring snacks because I ride with my Filipino friend who always brings his homemade snack called biko, which is almost always enough for the whole group.
When you’re starting out on the trails, it’s essential to choose wisely. My advice to new riders is to avoid jumps and practicing on obstacles, especially if you’re on a beginner trail. Focus instead on completing the trail safely.
Attempting a professional-level downhill track before you’re ready can have serious consequences. It can shatter your confidence and even turn you off mountain biking altogether.
Recognizing your limits is a valuable skill, particularly in mountain biking. Stick to trails that match your skill level and progress gradually. As you become more comfortable on your bike and build strength and stamina, you’ll find jumps and obstacles more enjoyable.

Remember, it’s okay to take it slow. Rushing into advanced maneuvers can wait until you’re truly ready.
Hitting the trails with a friend who’s more experienced can do wonders for your mountain biking journey. Observing how they navigate obstacles and master techniques provides invaluable lessons. Following their lead down a trail, trying to mimic their lines, opens up new possibilities you might not have considered before.

Plus, having a skilled partner can be a lifesaver. If you run into trouble or need to fix your bike, they’re there to lend a hand. Their experience with similar issues and having the right tools can make all the difference.
But it’s not just about skill improvement. Riding with friends makes the whole experience less daunting and more enjoyable. It’s about sharing the excitement of the ride and strengthening your love for this incredible sport.
Consistency is crucial in every aspect of life, and mountain biking is no exception. It’s not just about memorizing beginner tips; consistency builds the most valuable asset: experience.
Through your own experiences, you’ll gain invaluable insights. No one can precisely instruct you on how to shift your weight or control your brakes; these skills develop over time spent on the bike.
Regular mountain biking may seem like a chore to some, but I can think of far worse things than hitting the trails regularly!
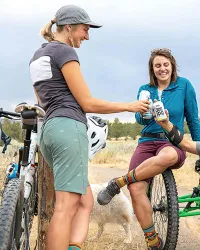
Mountain biking is all about sharing the experience. A friendly smile, a high five on the trail, or a celebratory cheer at the finish line goes a long way.
Let your enthusiasm be contagious, inspiring others to enjoy the ride just as much as you are. After all, the joy of conquering a challenging trail or simply cruising through nature is even sweeter when shared with fellow riders.

If you’re not in top shape, expect to feel the effects of fatigue after your first mountain biking adventure. Personally, I experienced fever and soreness in my lower body and arms for two days afterward.
It was rough, luckily it happened over the weekend when I had no work, but even on Monday, I still felt pretty lousy. However, once I recovered, I felt a strong urge to hit the trail again and challenge myself.
Repeated trips on the trail will help your body adapt, gradually moving you beyond the “chill ride” phase. Only then can you start experimenting with more advanced maneuvers.
If you didn’t experience any sickness, consider yourself lucky! It likely means you’re in good shape. However, there’s something to be said for the rite of passage that comes with pushing your limits. Share your experiences in the comments below!
Remember, feeling a little sore is a temporary consequence, while the love of mountain biking can last a lifetime!
One of the biggest mistakes I made when I first started mountain biking was neglecting to wear padded shorts. Let me tell you, saddle sores and chafing were no picnic!
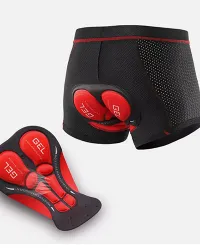
That’s why I highly recommend investing in padded shorts. They’re a game-changer when it comes to preventing discomfort and soreness. After a few days on the trails, you’ll discover bones you never knew you had, and trust me, it’s not a pleasant sensation. But with padding, it’s like riding on clouds.
On a more serious note, if you’re in the market for mountain bike-specific shorts, opt for ones that come with padded liners (chamois pad) – it’s a lifesaver. Your rear end will thank you later!
Your tires are your bike’s only connection to the rugged terrain beneath you, underscoring the importance of checking and adjusting your tire pressure before hitting the trails.
One common mistake riders often make is misjudging tire pressure. When it’s too low, your tires are vulnerable to punctures or pinch flats, while excessive pressure can lead to diminished traction, causing your wheels to slip on obstacles like roots or rocks, particularly in slippery conditions.
So, how much air should you pump into your tires? Well, it’s subjective. However, a good starting point is around 28psi in the rear tire and 25psi in the front.
Typically, the rear tire requires slightly higher pressure to absorb impacts, while the front tire benefits from slightly lower pressure for improved grip and control during braking and cornering maneuvers.
My personal approach involves giving the tire a gentle squeeze and adjusting the pressure until it strikes the right balance—soft enough to enhance traction on the soil but firm enough to avoid pinch flats. Experiment with different pressures to tailor your setup to your weight and preferred mountain biking style.
Investing in some key items can greatly enhance your mountain biking experience without breaking the bank.
Helmet (Non-Negotiable!): Safety comes first. Opt for a mountain bike-specific helmet with MIPS (Multi-directional Impact Protection System) or similar technology for maximum protection on off-road terrain.
Grippy Footwear: Upgrade to flat-pedal mountain bike shoes for better pedal grip and control. Especially for beginners, these shoes make a huge difference in confidence and ease of dismounting.
Padded Shorts for Comfort on the Trail: Say goodbye to chafing with mountain bike shorts designed for comfort and flexibility. Look for shorts with built-in padded liners (chamois) and durable materials for rugged terrain.
Knee Protection: Protect your knees from scrapes, bumps, and pedal strikes with reliable knee pads. They’re essential for both safety and comfort, especially for beginners.
Gloves (Your Call): While optional, gloves offer enhanced grip, protection from scrapes, and moisture-wicking properties. Give them a try to see if they complement your riding style.
Sunglasses (Bonus Protection): Keep your eyes shielded from bugs, dirt, and UV rays with a quality pair of sunglasses. Clear vision is crucial for a safe and enjoyable ride on the trail.
When you’re a beginner, you can do anythng at the start. But in the middle of your trail ride, when you start to get tired and things start to ache all over, technical tips like this tends to fly off the window but are still very good to know. Remember, you’re a beginner, just chillax.
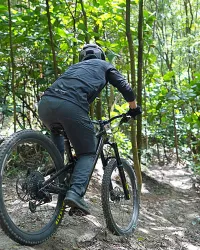
As a beginner hitting the trails, it’s easy to forget the technical details once fatigue sets in. But mastering body positioning is crucial for a smooth and controlled ride, especially during descents. Let’s delve into some key tips to keep in mind:
Mastering these body positioning techniques will distribute your weight effectively, allowing for smoother descents and enhanced control over the bike. With practice and awareness, you’ll develop the muscle memory needed to execute these techniques seamlessly, ensuring a more enjoyable and safe riding experience.
As a beginner, you might assume that staying seated offers more control, especially during descents. However, the opposite is true. Standing up on the pedals grants you the flexibility and maneuverability needed to maintain perfect balance on the trail.
Here’s why standing up is essential:
In essence, mastering the stand-up technique is crucial for navigating challenging terrain with confidence. Practice maintaining the correct posture and foot position to maximize your control and comfort while riding.
New to mountain biking? It’s natural to tense up when things get rough. But here’s the secret: a stiff body leads to a rough ride. Here’s how to loosen up and become one with the trail:
Cornering can feel intimidating at first, but it’s a skill you can build with practice. Here’s a breakdown to get you started:
Master the Basics First:
Before diving into cornering, make sure you’re comfortable with braking, shifting, and body position on flat terrain. These foundational skills will make cornering much smoother.
Taking on Berms:
Berms (banked corners) are a great way to practice cornering because they offer extra support. Here’s how to tackle them:
Benefits of Lowering Your Outside Foot:
Improved Clearance: Lowering your outside foot gives you more space between your pedal and the ground, preventing pedal strikes.
Mountain bike trails throw a variety of challenges your way, from steep climbs to technical descents. Using your gears effectively helps you handle them all with confidence and control.
Here’s why shifting is your friend:
Anticipate and Shift: Don’t wait until you’re struggling on a climb or losing control on a descent to shift. Read the terrain ahead and anticipate gear changes for a smooth and efficient ride.
Bonus Tip: Practice shifting gears on flat terrain to get comfortable with the process. The more comfortable you are shifting, the more you’ll use it to your advantage on the trail.
Mountain bike trails are a playground for nature lovers, so practicing good trail etiquette goes a long way. Here’s how to be a courteous trail user:
Let’s face it, even the best rides can be derailed by a flat tire or a broken chain. But don’t let a mechanical issue ruin your fun! Here’s how to be prepared:
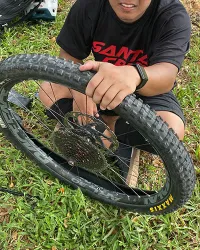
Learn the Basics: Take a bike maintenance class or watch instructional videos online to learn essential repairs like fixing flats and adjusting your drivetrain.
Pack a Repair Kit: Carry a basic repair kit with you on every ride. It should include essentials like a pump, tire levers, spare tube, patch kit, and a multi-tool.
Be Prepared to Fix It: Knowing how to use your repair kit is key. Practice fixing flats and other common problems at home before you hit the trail.
Shred those fears, shift into high gear, and conquer the trails! These beginner tips are your launchpad for a lifetime of epic mountain bike adventures. It’s more than a ride; it’s camaraderie, conquering challenges, and pure outdoor exhilaration. Keep rolling, respect the trails, and let every pedal stroke fuel your stoke. Here’s to countless adventures and endless mountain bike bliss!


