Waxing bike chains offers significant benefits, such as reducing friction, increasing efficiency, and extending the lifespan of the chain and drivetrain components. This method provides a cleaner, quieter ride by repelling dirt and water better than traditional lubricants.
Despite its advantages, waxing chains requires more initial effort and equipment, making it more popular among avid mountain bikers and those who prioritize performance and longevity over convenience. Enthusiasts appreciate the long-term maintenance benefits and smoother riding experience it offers.
Step-by-Step Guide to Waxing a Mountain Bike Chain
Waxing your mountain bike chain can improve performance and reduce maintenance. Follow these steps to wax your chain properly.
Materials Needed:
Chain breaker tool
Degreaser
Methylated spirits
Slow cooker
High-quality paraffin wax or commercial chain wax
Bent spoke or hanger
Gloves and safety glasses
Thermometer (optional)
Step 1: Clean the Chain Thoroughly
Remove the Chain:
Use a chain breaker tool to remove the chain from the bike.
If your chain has a master link, use master link pliers to disconnect it.
Degrease the Chain:
Rinse the chain with water to remove loose dirt and grime.
Place the chain in a container filled with degreaser. Let it soak for 10-15 minutes to dissolve the grease and grime.
Use a brush to scrub each link of the chain thoroughly, focusing on the rollers and pins where dirt accumulates. Ensure all grease and dirt are removed.
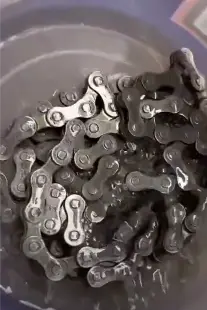
MTB chain soaked in degreaser
Rinse with Methylated Spirits:
Fill a second container with methylated spirits. This will remove any residual degreaser that might prevent the wax from bonding properly to the chain.
Drying MTB Chain with tissue and microfiber cloth
Place the degreased chain into the container with methylated spirits. Shake the container vigorously for 2-3 minutes to ensure the chain is thoroughly rinsed.
Remove the chain from the methylated spirits and lay it on a clean rag. Pat it dry to remove excess liquid. For faster drying, you can use a hair dryer or compressed air. Ensure the chain is completely dry before proceeding to the next step.
Inspect the Chain:
Run the chain through a clean towel or rag. If the rag comes away clean, the chain is ready. If not, repeat the degreasing and rinsing process.
Ensure there is no visible dirt, grime, or grease on the chain. The chain should look metallic and free of any contaminants.
Step 2: Prepare the Wax
Melt the Wax:
Turn the slow cooker to a high setting. Wax typically melts between 60-90°C (140-194°F). Using the high setting, the wax should take about 15-20 minutes to melt completely.
If you prefer, you can use the low setting, which will take approximately 30-40 minutes. Stir occasionally to ensure the wax melts evenly.
Wax melting with slow cooker
Monitor the Temperature:
If you have a thermometer, monitor the temperature to keep it within the optimal range (70-90°C). This ensures that the wax melts thoroughly without degrading any low-friction additives that might be present.
Stir occasionally and Check for Full Melting:
As the wax begins to melt, use a stirring utensil to mix it occasionally. This helps distribute the heat evenly and ensures a uniform consistency.
The wax is ready when it is completely melted and has a smooth, liquid consistency without any solid chunks. The liquid should be clear or slightly translucent, depending on the type of wax used.
Step 3: Wax the Chain
Prepare the Chain
Bend a spoke or use a metal hanger to create a J-shaped hook. This will be used to hold the chain while it is immersed in the wax. Avoid hooking the very last rollers of the chain as they can be dislodged.
Hang the chain on the bent spoke or hanger, ensuring all links can move freely. This ensures the wax can penetrate every part of the chain effectively.
Immerse the Chain:
Dipping Chain in Wax
Carefully lower the chain into the melted wax, ensuring it is fully submerged. Use the bent spoke or hanger to maneuver the chain.
Gently swish the chain back and forth in the wax to allow it to penetrate all the links and rollers. This movement helps the wax reach every part of the chain.
Keep the chain in the wax for about 20 minutes. You will know it’s ready when no small bubbles are coming out of the chain and the wax starts to set.
Cool and Remove the Chain:
Let the wax cool until it starts to solidify on the surface. This usually takes a few minutes and helps ensure the wax has penetrated the chain thoroughly.
Carefully lift the chain out of the wax using the bent spoke or hanger. Allow any excess wax to drip back into the cooker.
Hang the chain in a well-ventilated area to allow it to cool and the wax to harden completely. Ensure the chain is not in contact with any surfaces to prevent sticking.
Drying Chain dipped in wax
Step 4: Reinstall the Chain
Break the Wax Bond:
Once the chain is dry, break the wax bond by running the chain through the gears or manually flexing each link. This ensures the chain moves freely and smoothly.
Reattach the Chain:
Reattach the chain to your bike using a master link or chain tool. Ensure it is properly tensioned and aligned for smooth operation.
Cleaning this mess is harder than it looks
Step 5: Test and Maintain
Test the Chain:
Rotate the pedals and shift through all the gears to ensure the chain moves smoothly and doesn’t skip or jump off the gears.
Regular Maintenance:
Clean and re-wax the chain regularly, especially after riding in wet or muddy conditions. This helps maintain the protective wax coating and keeps your drivetrain running efficiently.
Tips and Tricks for Waxing Your MTB Chain
Use Quality Wax: Opt for high-quality paraffin wax or commercial chain wax products designed specifically for bike chains.
Avoid Contaminants: Ensure all cleaning solvents are thoroughly rinsed off to prevent any residue from interfering with the wax bond.
Temperature Control: Use a thermometer to keep the wax at an optimal temperature to prevent additives from degrading.
Pros and Cons of Waxing an MTB Chain
Prosof Chain Waxing
Reduced Friction:
Waxed chains have lower friction compared to oiled chains, which results in smoother and more efficient pedaling. This can lead to improved performance and speed.
Extended Chain Life:
Waxing helps to protect the chain from dirt, grime, and moisture, reducing wear and tear. This extends the lifespan of the chain and other drivetrain components.
Cleaner Operation:
Waxed chains repel dirt and grime better than traditional lubricants. This means the chain stays cleaner for longer periods, which is especially beneficial for mountain biking in muddy or dusty conditions.
Quieter Ride:
A waxed chain typically operates more quietly than a lubricated chain, providing a more pleasant riding experience.
Less Maintenance:
Once properly waxed, chains require less frequent reapplication compared to oil-based lubricants, saving time on maintenance.
Cons of Chain Waxing
Initial Setup Time:
Waxing a chain requires more time and effort initially compared to simply applying oil. The process involves thoroughly cleaning the chain, melting the wax, and ensuring proper application.
Special Equipment Needed:
Waxing requires specific equipment, such as a slow cooker and high-quality wax, which might not be readily available to all cyclists.
Periodic Re-Waxing:
Although waxed chains require less frequent maintenance, they still need to be re-waxed periodically, especially after riding in wet or muddy conditions.
Learning Curve:
There is a learning curve associated with waxing chains, which might deter some cyclists from adopting this method. Properly waxing a chain involves multiple steps and attention to detail.
Potential for Stiff Links:
If not done correctly, waxing can lead to stiff chain links, which can affect the smoothness of your ride. Ensuring the chain is fully mobile after waxing is crucial.
Wax On, Ride Strong: Share Your Chain Waxing Stories!
Waxing your mountain bike chain is a highly effective method to enhance performance and reduce the need for frequent maintenance. By following the detailed steps for cleaning, preparing, and waxing your chain, you ensure optimal lubrication and protection for your drivetrain.
This process not only extends the life of your chain but also ensures smoother and more efficient rides. Check out our guide on how to clean mountain bike chain.
Have you tried waxing your bike chain? Have you ever tried using chain wax for something unconventional, like waxing your chest hair, or legs?
Did you succeed, or did it not work out as planned? Share your experiences and any hilarious outcomes in the comments below. I tried waxing my chest hair with chain wax, and let’s just say the chest hairs are still there! Let’s hear your stories!
Dirt Bert
Swapped a suit and tie for a helmet and goggles, Delbert's not your typical engineer. He found his zen on rocky trails, catching the mountain biking bug and never letting go. Now, he shares his trail wisdom (and maybe some epic wipeout stories) on dirtlifebike.com to help you conquer your first climb and shred with confidence!