Crashing is part of cycling as crying is part of love.
Johan Museeuw
- The Lion of Flanders
Crashing is part of cycling as crying is part of love.
Johan Museeuw
- The Lion of Flanders
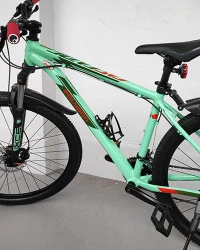
Conquer the Mountain. Find Your Freedom.
Conquer the Mountain. Find Your Freedom.

Additional factors to consider:
Feeling stuck climbing or descending with your seat in the way? A dropper post is your secret weapon, but all those options can be confusing.
Let’s dive deep into finding the perfect dropper post for you in just a few steps!
Before diving headfirst into the world of dropper posts, it’s crucial to ensure compatibility with your mountain bike. Two key measurements will determine if a particular dropper post fits your frame: ride height and maximum insertion depth. Let’s break down these measurements and how to find them!
Imagine yourself conquering a trail, powering through the climbs and shredding the descents. That’s the ideal position we’re aiming for when measuring your ride height. Here’s what you need to do:
Grab your trusty tape measure.
Locate the top of your seat collar – the clamp that secures your seatpost to the frame.
With your dropper post fully extended, (or your current seatpost if you don’t have a dropper yet) measure the distance from the top of the seat collar straight up to the center of the saddle rails. This is your ride height.
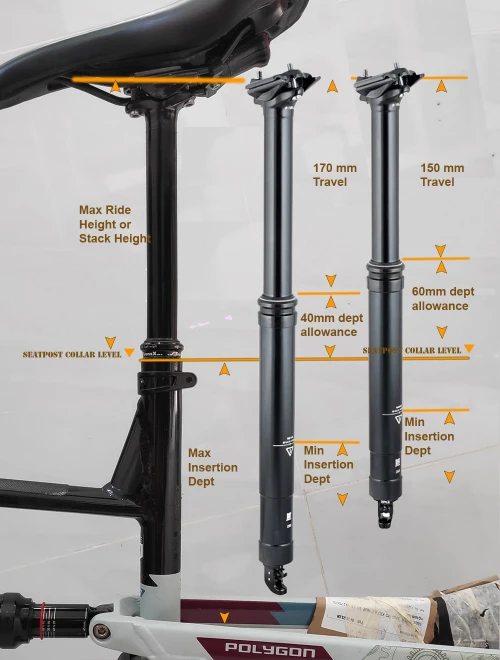
Why is this important? Your ride height determines how high your seat needs to be for comfortable and efficient pedaling. A dropper post allows you to quickly lower your seat for technical sections and descents, but you still need to be able to raise it back to a comfortable pedaling position.
Measure from the top of your seat collar to the center of your saddle rails with the dropper post fully extended at your preferred pedaling height. This measurement represents the maximum height your saddle will reach when the post is fully extended. You would want to achive equal or slightly less than your max ride height for the dropper seatpost to be comfortable to use
Measure from the top of the seat collar down to any obstructions in the seat tube that could limit insertion depth (like water bottle cage mounts). This will tell you how much of the dropper post can be inserted securely into your bike frame.
The maximum insertion depth is typically greater than the minimum insertion depth specified by the dropper post manufacturer (a safety requirement).
Now, let’s explore how deep your new dropper post can go into your frame. This measurement, known as the maximum insertion depth, is crucial for ensuring safety and proper dropper post function. Here’s how to find it:
Remember: Safety first! Your dropper post needs to be inserted deep enough into the seat tube for secure and stable operation. The manufacturer will specify a minimum insertion depth for each dropper post model. Always ensure your chosen dropper post has a total length (when fully extended) that allows for both your desired ride height and the minimum insertion depth specified by the manufacturer.
Bonus Tip: Masking tape can be your friend! When using the rigid seatpost trick, apply a piece of masking tape to the seatpost where it meets the seat collar before inserting it. This will create a clean mark for easy measurement.
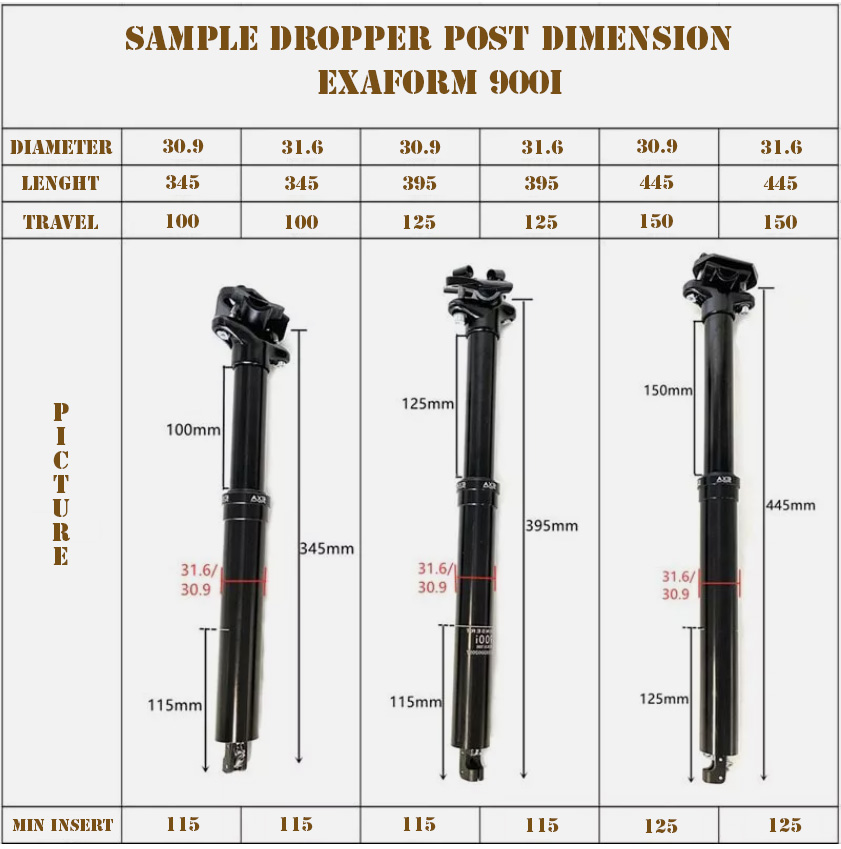
Safe installation requires inserting your dropper post deep enough into the frame. Each dropper post has a minimum insertion depth specified by the manufacturer. When choosing a dropper post, consider both the overall length (fully extended) and the minimum insertion depth. These measurements ensure both a comfortable fit for you and proper compatibility with your bike’s seat tube.
Important Note: Some older hardtail frames, especially those with water bottle cage mounts positioned high on the seat tube, may not have enough clearance for the minimum insertion depth required by certain dropper posts. Always check your bike’s seat tube measurements and dropper post specifications before purchasing to avoid compatibility issues.
Remember: Don’t hesitate to consult with experienced riders or mechanics at your local bike shop. They can provide valuable insights and personalized recommendations based on your riding style, budget, and bike’s specific needs.
Before you get too excited about fancy dropper post features, there’s one crucial detail to consider: diameter. Just like shoes that are too big or too small can ruin your day, a dropper post with the wrong diameter won’t fit your bike. Here’s how to find the perfect match:
This is the quickest and most reliable method. Grab your bike’s manual or head to the manufacturer’s website. They should list the seat tube diameter, typically in millimeters (common sizes are 27.2mm, 30.9mm, 31.6mm, and 34.9mm).
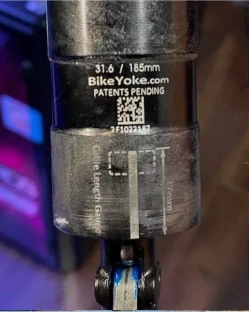
If you already have a seatpost installed, the diameter might be stamped or printed directly on the post itself. Look near the bottom and you might find your answer written there.
For older bikes or if your seatpost lacks markings, digital calipers offer a precise way to measure your seat tube’s inner diameter. Slide the jaws of the calipers across the inside of the seat tube and take your measurement in millimeters.
Remember: A snug fit is crucial. A dropper post that’s too small will have too much play and compromise safety. One that’s too big simply won’t fit into your seat tube.
Pro Tip: Once you know your seat tube diameter, use it as a filter when shopping for dropper posts online or at your local bike shop. This will save you time, and frustration and you can avoid buying a bike seatpost adapter!
While diameter ensures a proper fit, dropper post compatibility also hinges on your bike’s cable routing system. Here’s a breakdown of the two main options to help you decide:
Imagine a clean, streamlined look where all the cables are hidden inside your frame. That’s the beauty of internal cable routing.
But there’s a catch: your bike needs to be specifically designed for it, with designated channels inside the frame to guide the cables, making installation easy.
Some bikes don’t have designated channels, making installation and maintenance trickier and requiring more effort.
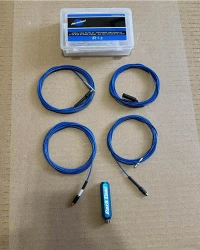
Bonus Tip: Use Internal Routing Kit for Internal Route Cable Installation
These flexible tools help guide the cable through the frame. You simply feed the drain snake into the frame and follow along with the magnet until it pokes out where you need it.
Then, simply attach the end of it to your outer housing and pull it back through, making cable installation simple.
External Routing: Simple and Straightforward
External routing keeps things simple. The cables run along the outside of your frame, attached with zip ties or straps. This option works with most bikes, regardless of internal routing capabilities.
It’s also easier to install and maintain, making it a great choice for DIY enthusiasts. Just take note that in some bike frames, internal cables may be exposed in the middle part of the bike, and these moving cables may pull moisture inside their external housing, especially in wet climates.
The travel distance of a dropper post determines how far it can be lowered for technical descents and raised back up for comfortable pedaling. Travel distances typically range from 100mm to 200mm, directly impacting your saddle clearance in the lowered position.
The best actuation style depends on your individual preferences and riding style. While I prefer placing the lever under the handlebar with shifters on the right, choose what feels comfortable for you.
Here’s a breakdown of the two main actuation styles:
Beyond placement, dropper posts come in three actuation styles, each with its own advantages:
Mechanical: The most budget-friendly option, these systems are easy to maintain and offer a familiar cable-operated feel.
Hydraulic: Providing the smoothest actuation, hydraulic droppers mimic the performance of hydraulic disc brakes, but require occasional bleeding for optimal performance.
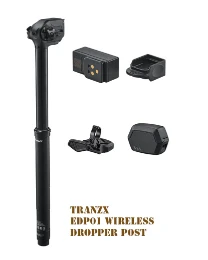
Electronic: These high-tech systems offer clean cable-free routing and the potential for integration with your bike’s electronics, but come at a premium price.
After installation, I’m sure you can’t wait to go to the trail and test your dropper seatpost.
Here’s how to maximize the use of your dropper seat post:
Climbing (raising your seat):
With the dropper fully extended, your knees should have a slight bend at the bottom of your pedal stroke. This position offers optimal power transfer for efficient climbs.
Having too much travel can cause you push your seat down with your bottom every time you fully extend it. It’s a minor inconvenience. Try adjusting your dropper seatpost to your comfortable maximum riding height.
Technical Terrain & Maneuverability(lowering your seat):
Descending rocky sections or tackling tricky switchbacks? Dropping your seat gets it out of the way, allowing you to lower your center of gravity for increased stability and control without breaking your momentum at the first sign of obstacles.
Even on flat sections, rough terrain, or tight corners benefit from a lowered seat. This frees up your body movement for smooth handling and quick reactions.
Your dropper seatpost travel should reach your lowered ideal saddle height where you can tackle the terrain with ease.
Still a bit confusing, so let’s clarify with an example. My max ride height is 210mm from the seat collar, and I’m torn between 170mm and 150mm travel. My bike has a seat post diameter of 31.6″ and a max insertion depth of 350mm. Since you were with me in the shop, I asked: which one should I pick?
| 150 mm Travel | 170 mm Travel | To Note: | ||
|---|---|---|---|---|
| A | Max Ride Height (By User) | 210 mm | 210 mm | Max riding height level you are comfortable with |
| B | Max Insertion Dept on Bike (Check Bike) | 350 mm | 350 mm | Always check for obstructions like bottle cage mounts |
| C | Seatpost Diameter (Check Bike) | 31.6″ | 31.6″ | Check on bike or manuals |
| D | Travel (By User) | 150 mm | 170 mm | Choose a travel lower than your max ride height |
| E | Dept Allowance (A-D) | 60 mm | 40 mm | Allowance for adjusting stack height of your seatpost |
| F | Stack Height (D+E) | 210 mm | 210 mm | Length from Seat Collar to saddle rails. Must be equal or lower than your max riding height |
| G | Dropper Seatpost Total Length | 459 mm | 498 mm | write according to specs |
| H | Dropper Seatpost Insertion Dept (G-F) | 249 mm | 288 mm | Must be more than your minimum insertion dept and less than Max Insertion Dept on Bike |
Both the 170mm and 150mm travel dropper seatposts can be installed on my bike, and each has a depth allowance that lets me adjust the height to my comfort level. Both have Seatpost insertion dept that is more than the minimum insertion requirement for seatpost and less than the max insertion dept on the bike.
The 170mm offers slightly better control and maneuverability with its increased travel, while the 150mm is more budget-friendly, leaving me extra cash to upgrade other parts of the bike. Decisions, decisions!
Now that you have the numbers, its time to choose your dropper seatpost. The next thing to consider is the budget and the excuse you need to give your parents, spouse, or girlfriend in order to get approval for another purchase for your mountain bike. Let us know in the comments below if you have ever been in this type of sticky situation.
With the knowledge you’ve gained about travel, actuation styles, and finding the perfect fit, you’re well-equipped to choose the dropper post that elevates your ride.
Remember, the best option considers your riding style, the terrain you tackle, your bike’s limitations and geometry, and your physique.
Don’t hesitate to consult your local bike shop for expert advice and to try out some dropper posts to experience the difference firsthand. Happy trails!