Crashing is part of cycling as crying is part of love.
Johan Museeuw
- The Lion of Flanders
Crashing is part of cycling as crying is part of love.
Johan Museeuw
- The Lion of Flanders
Conquer the Mountain. Find Your Freedom.
Conquer the Mountain. Find Your Freedom.
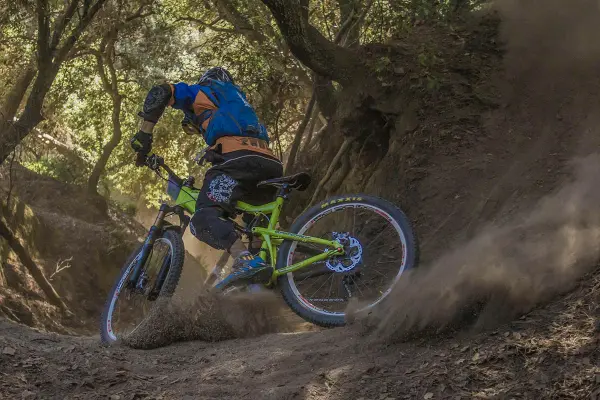
My friend excitedly led me down a downhill trail, promising an exhilarating experience. However, as we picked up speed, I quickly realized it was nothing like cruising down a smooth road. Instead, the trail was strewn with rocks and root features, making for a thrilling but challenging ride. With each obstacle, I couldn’t help but wonder:
Smooth is key: Apply brakes progressively, don’t slam them. Think dimmer switch, not on/off button.
Modulate for control: Use both brakes and adjust pressure to avoid skids. Feel the bike’s response.
Body position matters: Lower your center of gravity and shift weight back for stability.
Brake before corners: Slow down on straightaways, then ease off brakes as you enter the turn.
Advanced techniques: Explore engine braking (downhill gear changes) and trail braking (light braking while cornering) once comfortable with the basics.
Remember: Practice good braking technique on flat terrain before hitting those thrilling descents!
Downhill descents offer exhilarating thrills, but safe navigation requires mastering proper braking techniques. Here are some essential tips to help you descend with confidence and precision:
Ever wonder how you slow down on your bike? It’s all thanks to friction, your friend in safe cycling! Squeezing the brakes creates friction between the pads and rims (rim brakes) or disc (disc brakes). This friction converts your speed into heat, essentially slowing you down. The key is to modulate (control the pressure) for smooth, controlled stops without locking your wheels.
Don’t Douse Hot Brakes!
While brakes can handle high temperatures, throwing water on scorching hot ones is a bad idea. Sudden cooling can cause warped discs or cracked pads, just like a hot glass cracking in cold water. This can lead to uneven braking and safety problems. The best way to handle hot brakes is to let them cool naturally. Park safely and take a break while they cool down.
Alternatively you can utilize techniques like engine braking (engine refers to the drivetrain, which includes the crankset, cassette, derailleur, and chain) or downshifting if applicable. Planning and anticipating where to brake in your routes is a good practice aswell.

Conquering downhills requires mastering the dynamic duo: your front and rear brakes
The Powerhouse Front Brake: This brake delivers significantly more stopping power, making it your go-to for slowing down quickly. However, squeeze too abruptly, and you risk locking the front wheel, causing a nasty wipeout. The key is progressive braking: start gentle and gradually increase pressure for smooth, controlled deceleration.
The Finesse Rear Brake: While the front brake packs a punch, the rear brake offers more subtle control. Use it to fine-tune your speed and maintain traction on loose surfaces. But remember, relying solely on the rear brake can lead to longer stopping distances or skids, especially on steep slopes.
Forget “Both Brakes Together”: Embrace Balanced Braking
You might have heard the simple advice: “use both brakes together” for downhill mountain biking. While this works initially, true downhill mastery lies in balanced braking. This means using both brakes effectively, not necessarily at the same time.Brake Lever Position: A Straight Shot to Control
Imagine yourself in an attack position, leaning forward with balanced weight. Your wrists, forearms, braking fingers, and the brake levers should form a straight line. This optimal positioning provides maximum leverage and comfort, allowing you to react smoothly and efficiently when braking.
Fingertip Frenzy: Two vs. One?
There’s a debate between two braking styles: two-finger braking and one-finger braking.
Two-Finger Braking: Power for Beginners
This technique offers more power, making it ideal for beginners or less technical terrain. With two fingers secured on the levers, you can exert more force for greater stopping power.
Using both your index and middle finger on the levers provides greater leverage for easier modulation, allowing you to squeeze progressively and achieve controlled stops. Additionally, riders with smaller hands like kids may find two fingers more comfortable than reaching for a single-finger grip.
Remember, proper technique is key regardless of hand position – practice squeezing the levers smoothly, not grabbing abruptly. As your strength and confidence improve, you can naturally transition to single-finger braking if desired.
One-Finger Braking: Precision for Pros
For experienced riders tackling technical descents, one-finger braking becomes a finesse technique. By using just their index finger, they achieve finer control over braking pressure, allowing for nuanced modulation on tricky terrain.
This focus on feel translates to better bike control, further enhanced by the ability to maintain a firm grip on the handlebars with the remaining fingers.
Hydraulic disc brakes, with their superior power, are perfectly suited for this style, requiring minimal hand strength and enabling delicate one-finger braking with exceptional stopping power.
However, smooth and progressive lever pulls remain crucial, even with one finger, to prevent wheel lockup.
Experiment and Find Your Fit!
Ultimately, the best finger placement depends on your riding style and comfort level. Experiment on flat terrain to discover what feels most natural and allows for precise control. Remember, proper setup is key to conquering descents with confidence!
Brakes are your friend, but overdoing it can cause trouble and mostly experienced when using two-finger braking. Braking too hard can:
Over-the-Bars Crash: Braking too hard, particularly on the front wheel, can lock the tire and cause you to fly over the handlebars. This is because the locked front wheel acts like a pivot point, while your body and the bike continue moving forward.
Skids and Loss of Control: Slamming on the brakes can lock your wheels, reducing traction and making it difficult to steer. This can lead to skids and potential wipeouts.
Wear Down Your Pads Faster: Excessive braking heat can wear out your brake pads quicker, leading to more frequent replacements.
Focus on Smooth Braking. Practice applying the brakes progressively with increasing pressure. This allows you to slow down safely while maintaining control of your bike.
Brakes are your allies on the downhill, but overdoing it can turn them into foes. Slamming on the brakes is a recipe for trouble, leading to skids, premature pad wear, and ultimately, loss of control. The key to confident downhill riding is mastering modulation, a technique that allows you to control your speed smoothly and efficiently.
Ditch the On/Off, Embrace the Dimmer: Think of your brakes like a dimmer switch, not an on/off button. Squeeze gently and increase pressure gradually. This allows for smooth deceleration without locking your wheels, keeping you in control and preventing those heart-stopping skids.
Become One with Your Bike: Practice modulation to develop a feel for the right braking force. Pay attention to your bike’s response. A skid might feel like a wobble or a sudden loss of grip in your handlebars.
Pro-Tips for Mastering Modulation:
Start Soft, Build Up Strong: Begin with a light touch on both brakes simultaneously. Gradually increase pressure as needed. Imagine “feathering” the brakes, not grabbing them with all your might.
Listen to Your Ride: As you brake, feel how your bike reacts. If you sense a skid coming on, ease off the pressure slightly. Remember, maintaining a light touch and making small adjustments is key to achieving smooth, controlled braking.
Brakes are crucial, but conquering descents requires more. Mastering your body position is the key to staying stable and shredding downhills with confidence. Here’s how to nail it:
Get Low, Stay Low: Bend your knees and elbows slightly, lowering your center of gravity. Think of yourself as a coiled spring, ready to absorb bumps and maintain control. This stable position also allows you to react quickly to changes in the terrain.
Weight Back for Traction: Shift your weight slightly backwards. This increases traction on your rear wheel, giving you better control while braking and maneuvering through corners. Imagine yourself pushing gently into the pedals to achieve this position.
Eyes on the Prize, Not Your Feet: Resist the urge to stare at your front wheel! Focus your gaze on where you want to go, looking ahead to anticipate the trail and navigate turns smoothly. This will help you maintain a smooth line and avoid surprises.
Practice Makes Perfect:
Before tackling aggressive downhill slopes, master these body positioning techniques on flat terrain. This will build muscle memory and confidence for conquering steeper slopes. Imagine yourself carving through a smooth, flowing trail – that’s the feeling you’re aiming for!
Imagine carving through corners with the grace of a mountain goat – precise, controlled, and flowing. The secret weapon? Early braking. Don’t wait until the turn itself, or you’ll be wrestling with skids and wobbly lines.
Here’s why: Braking while turning shifts your weight, reducing traction and making your bike less responsive. Instead, think ahead! Apply the brakes on the straight section leading up to the corner. Gradually ease off the brakes as you initiate the turn.
This maintains a controlled speed, allowing you to lean into the corner smoothly and keep your tires glued to the trail.
Unlocking the Flow State:
Early braking isn’t just about looking cool; it offers a multitude of benefits:
Confident Control: By avoiding skids, you maintain bike stability and navigate corners with confidence.
Smoother Than Butter: Maintaining a steady speed through the corner translates to a smoother, more enjoyable ride – no more jerky transitions!
Efficiency is Key: You won’t lose precious momentum by slamming on the brakes mid-turn. This allows you to carry more speed through the entire section, making you a more efficient rider.
Feeling confident with the basics? Time to unlock your inner downhill master with these advanced techniques!
Engine Braking: Your Drivetrain’s Hidden Power
This technique utilizes your drivetrain’s resistance to become your ally on long descents. Simply shift down to a lower gear, and let the engine act as a brake, reducing stress on your brakes and preventing overheating. It’s a win-win for control and brake longevity!
Trail Braking: The Art of Smooth Cornering
Trail braking involves applying a light, sustained pressure on both brakes as you enter and navigate a turn. This maintains control and allows you to finesse your line through the corner. Imagine yourself gently feathering the brakes, maintaining a steady pressure as you lean into the turn. It’s a technique that takes practice, but it will transform your cornering skills!
But Before You Fly:
Master the basics of modulation and body position before attempting these advanced techniques. A solid foundation is key to safe and confident downhill riding.
Conquer the Descent:
By understanding how brakes work, using them in harmony, mastering modulation, staying in a good body position, and incorporating these advanced techniques, you’ll transform your descents. Imagine yourself confidently navigating those trails, feeling the exhilarating freedom that downhills offer!
Stay tuned for the next post in this series, where we’ll explore essential gear considerations for optimizing your mountain bike for downhill adventures!
Keep exploring! Dive deeper with related posts. HERE


