Crashing is part of cycling as crying is part of love.
Johan Museeuw
- The Lion of Flanders
Crashing is part of cycling as crying is part of love.
Johan Museeuw
- The Lion of Flanders
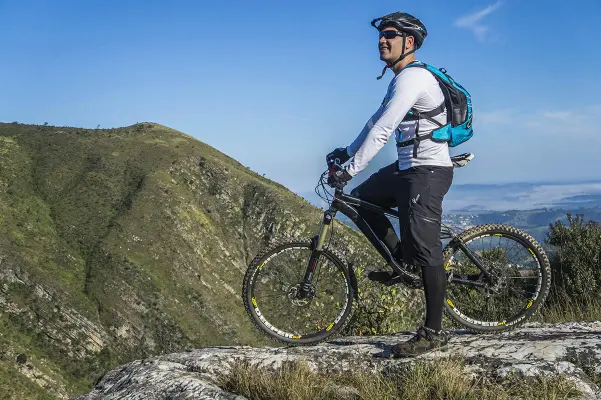
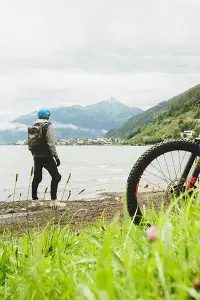
Conquer the Mountain. Find Your Freedom.
Conquer the Mountain. Find Your Freedom.
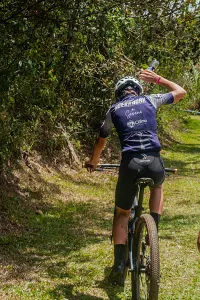
The scorching sun hung heavy in the sky, baking the earth. My friend, a notorious trailblazer, urged me to tackle a new route. “No sweat,” he said, “it’ll be a breeze.”
Trusting his word, I packed light, just me and my bike. Hours bled into one another. By the four-hour mark, hunger gnawed at my stomach, and my throat felt like sandpaper.
It was in this moment of physical depletion, staring down the unforgiving sun, that a crucial realization dawned on me:
Pack smart with a lightweight backpack, hydration essentials (bladder + electrolytes!), high-energy snacks, and repair tools (pump, patch kit, multi-tool). Don’t forget safety: headlamp, first-aid kit, and let someone know your route.
The thrill of a mountain biking adventure beckons, promising breathtaking scenery, challenging climbs, and the ultimate test of endurance. However, conquering those epic trails requires more than just courage – it demands smart packing and even smarter riding.
That’s where this guide comes in. We’ll cover everything you need to know about packing light for long mountain bike adventures, ensuring you’re prepared for any trail, any challenge, and any adventure that comes your way.
Conquering any trail requires a reliable partner. Your backpack should be lightweight and comfortable, allowing you to focus on the ride. Look for features that enhance your experience:
Hydration Compatibility: Easily access water without stopping for refills, keeping you hydrated on climbs.
Ample Storage: Pack all the essentials you need for your adventure, from tools and spare tubes to snacks and layers.
Proper Ventilation: Stay cool and comfortable during hot ascents with a breathable back panel and straps.
My Personal Choice: While many great backpacks exist, the Osprey Raptor stands out as my trusty companion on all rides. It offers the perfect trifecta of storage space, comfort, and breathability – essential for tackling any trail.
The 14-liter capacity ensures I have enough tools, tubes, and snacks for the journey, while the close-fitting hip belt eliminates bounce on challenging climbs. Even on hot descents, the breathable back panel keeps me cool, allowing me to focus on shredding singletrack.
Remember, the best backpack is the one that best suits your needs. Consider factors like the length of your rides, the type of terrain you tackle, and your personal preferences when making your choice.
Dehydration is your enemy on long climbs, so staying fueled is key. Here’s your hydration plan to power through every pedal stroke:
Hydration Backpack: Carry water comfortably with a hydration bladder sized for your adventure. Aim for 2-3 liters for most rides, with more for hotter weather or longer distances.
Electrolyte Boost: Go beyond just water, especially on hot days. Sweat depletes essential minerals like sodium and potassium, leading to fatigue and cramps. Replenish them with electrolyte drinks or tablets to keep you feeling strong.
Plain water remains a crucial base for hydration, but for longer rides, consider the additional benefits of electrolyte drinks:
Replenish Lost Minerals: Electrolytes prevent fatigue, cramps, and dehydration by replacing what you lose through sweat.
Enhanced Hydration: The flavor of these drinks encourages you to drink more, especially in hot weather.
Improved Performance (optional): Electrolytes may contribute to better muscle function and nerve transmission.
Extra Energy (optional): Some electrolyte drinks even include carbohydrates for sustained energy on extended adventures.
Choosing Your Electrolyte Solution:
Nuun Sport: My go-to for moderate rides or those with moderate sweat rates. It’s convenient, flavorful, and offers a balanced electrolyte profile.
Hammer Nutrition FIZZ: For intense rides, hot weather, or heavy sweaters. The higher concentration allows for customization, and some varieties include carbohydrates for an extra energy boost.
Remember, the best option depends on your individual needs. Consider factors like ride length, weather, and sweat rate when choosing your hydration solution.
Pro Tip: Sip Smart, Don’t Wait Until Thirsty! Drinking consistently throughout the day, even if you don’t feel thirsty, is key. Aim for small sips at regular intervals. This keeps your body topped up and avoids the energy crash that comes with dehydration.
Keep your energy high with these lightweight, high-calorie options:
Energy bars & gels: Quick and convenient sources of energy. Pack these for a quick and convenient energy boost. Choose options that are easy to digest on the move and prioritize easy-to-chew varieties for mid-ride consumption.
Trail mix: A delicious mix of nuts, seeds, and dried fruits for sustained energy. Whip up a homemade trail mix with nuts, seeds, and dried fruits for a delicious and energy-packed snack. Customize it with your favorite flavors for added motivation!
Real food options: Sliced fruits or whole-wheat tortillas provide natural energy and essential nutrients. Don’t underestimate the power of real food!
Sliced fruits, cheese, or whole-wheat tortillas provide sustained energy and essential nutrients. They’re a great way to avoid sugary crashes and keep your taste buds happy throughout the ride.
For that mid-ride energy boost, I have a sweet tooth for homemade biko. This Filipino rice cake, made with sticky rice, coconut milk, and dark sugar, is the perfect pick-me-up. The chewy texture keeps me satisfied, and the natural sweetness provides a welcome burst of energy. The best part? My friend often surprises me by whipping up a batch and stashing it in his backpack for our rides.
Of course, biko isn’t always an option. If we’re riding solo or my friend doesn’t have his magic biko stash, I rely on Cliff Bars. They come in a variety of flavors and offer a good balance of carbs and protein to keep me fueled throughout the ride.
Pack these essentials to handle trailside repairs:
Compact Pump: A small, high-pressure pump easily fits in your backpack, allowing you to inflate a flat tire and get rolling again. While CO2 canisters offer a quick fix (especially for 29er tires), they only inflate one tire..
Patch Kit: A lifesaver for punctures. Carry a kit with tire patches and adhesive to repair a flat tube. Pro tip: Learn how to use it before your adventure!
Multi-Tool: Your multi-tool is your trailside problem solver. Choose one with basic Allen keys, screwdrivers, and a chain breaker. This allows you to handle minor adjustments like tightening loose bolts or fixing a dropped chain, keeping you on the move.
Spare Inner Tube: While tubeless setups are great, punctures can still happen. A spare inner tube is a lightweight insurance policy that can get you back on track in case a patch won’t work.
Learning Curve: Don’t wait for a flat tire to figure out how to fix it. Practice basic repairs like patching a tube and adjusting your brakes at home before you hit the trail.
I used to swear by my Park Tool set. Their tools are incredibly durable, precise, and feel great in your hand. Unfortunately, after losing them a couple of times, I became a bit more cautious. Now, I carry a more generic brand multi-tool for trailside adjustments, keeping my Park Tools safe at home for more serious maintenance.
Safety is paramount. Beyond your helmet, consider additional gear for comfort and protection: padded shorts and gloves can significantly enhance your ride. But when it comes to unforeseen circumstances, pack these essentials:
Headlamp/Flashlight: Be prepared for low-light situations. A compact headlamp (worn on your head for hands-free use) is ideal. Alternatively, a flashlight can work, but limits your visibility when needed.
First-Aid Kit: Be ready for minor mishaps. A small, lightweight first-aid kit stocked with essentials like bandages, antiseptic wipes, and pain relievers can address cuts, scrapes, or insect bites.
Emergency Blanket: Stay warm in emergencies. An emergency blanket is a compact and lightweight way to retain body heat if you encounter unexpected weather or a breakdown that forces you to wait for help.
Always inform someone of your planned route and estimated return time before setting out. This ensures help is available if needed.
Conquering multi-day adventures requires mastering the art of bikepacking. Here are key strategies for packing your bike efficiently and comfortably:
Load Distribution:

Spread the Weight: Distribute your gear strategically across seat packs, handlebar packs, and frame packs. This creates a balanced feel on the bike and avoids putting undue stress on any one area.
Low and Centered: Pack heavier or bulkier items like sleeping bags and clothes in your seat pack and handlebar pack. This keeps your center of gravity low, improving handling and stability on the trail.
Frame Pack Optimization:
Pack Smart: Reserve the frame pack for denser items like tools, food, and water bladders. This keeps the weight close to your body’s center of mass for better control.
Maximize Your Storage:
Beyond the core bikepacking bags, explore additional storage options to fine-tune your setup:
Stem Bags: Perfect for stashing quick-access essentials like snacks, maps, or electronics.
Top Tube Bags: Ideal for storing smaller items like phones, GPS devices, or small tools.
Cargo Cages: Mount additional water bottles or even use them to carry gear like a rolled-up sleeping pad.
Additional Backpack (Optional): For longer trips, a backpack can be a valuable addition for bulky items or overflow supplies.
Pro Tip: Experiment! The best packing setup is the one that works for you. Consider your riding style, the length of your trip, and the terrain you’ll be tackling to find the ideal configuration for comfort and efficiency.
With a smart packing strategy and a focus on these key areas, you’ll be well-equipped to devour any multi-day mountain bike adventure. You’ll pedal with confidence, knowing your gear is dialed and ready for whatever the trail throws your way. But the reward goes beyond conquering those epic climbs – it’s the breathtaking scenery and the pure thrill of the descent waiting for you at the top.
Stay tuned for the next chapter in this series! We’ll dive deep into optimizing your mountain bike for the exhilarating rides that will have you grinning from ear to ear.
Keep exploring! Dive deeper with related posts. HERE